
")


Free Funnel Audit
Convert more customers today!
SEO
10 mins read

SEO
10 mins read
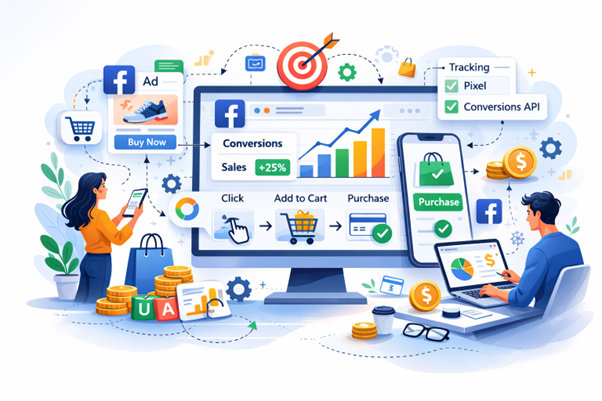
If you want to boost your ROI through Facebook Ads, you first need to track purchases on the platform. Tracking purchases on Facebook ads comes down to four things done right: installing the Meta Pixel correctly, configuring your purchase event with value and currency, connecting the conversions API, and validating everything inside reporting tools. That’s it.
A few years ago, you could drop a pixel on your site and call it a day. But that’s no longer the case. Privacy updates, browser limits, and cross-device behavior changed the game. Now you need a layered setup if you want clean data and reliable ROAS.
Once your tracking is live, you must actively monitor Facebook ads inside Ads Manager and cross-check with Google Analytics 4. If you don’t check the math, small gaps turn into big losses fast.
Now, let’s walk through the process step-by-step so you can understand how to do it and increase your ROI on your sales.
Facebook Ads purchase tracking is the process of measuring when someone buys from your website after interacting with your ad.
In simple terms, it connects ad spend to actual revenue. Without it, you’re just guessing your sales. But with it, you know exactly which campaign, ad set, or creative drives sales.
Here’s how it works at a high level. When someone clicks or views your ad, Meta assigns that interaction to a user session. If that person later completes a purchase on your website, the Purchase event fires through your Meta Pixel or Conversions API. Meta then attributes that sale back to the ad based on your selected attribution window.
Purchase tracking typically relies on:
Why does this matter so much? Because ad platforms optimize based on signals. If the Purchase event is missing or inaccurate, Meta optimizes toward weaker actions like clicks or page views instead of actual buyers.
Knowing how to track purchases on Facebook ads isn’t just about tracking, but knowing how to build a system that turns ad clicks into measurable, optimizable revenue data. That system is purchase tracking.
And once it’s configured properly, it becomes your feedback loop. You launch a campaign. You observe purchase data. You adjust budgets and creatives based on real performance.
Without that loop, scaling feels like gambling. But if you do it properly, following all the required steps, scaling feels more controlled.
Earlier, tracking used to be simple. A user clicked an ad. They bought it. The pixel fired. Done.
Now? Not so much.
While there aren’t many changes in Windows or Android devices, Apple’s iOS privacy updates have reduced data sharing. Browsers have blocked third-party cookies. Users switch between phone and laptop before buying. And ad blockers are common. Each of these chips away at your visibility.
There are also two attribution types to understand:
Both attributions matter, but they create reporting confusion if you don’t understand how Meta counts conversions.
Here’s the big shift. Installing a pixel alone is no longer enough. Browser-only tracking loses data. That means underreported purchases, inaccurate ROAS, and bad optimization decisions.
The solution is combining browser tracking, server tracking, and reporting validation. When you layer tools properly, you can monitor Facebook ads with much more confidence, even in a privacy-first world.
Tracking purchases on Facebook Ads helps you see exactly which campaigns are generating real sales, not just clicks. Once set up correctly, you can rely on accurate data to optimize, scale, and stop wasting budget.
If purchase tracking is the engine, the Meta Pixel is the spark plug. Meta Pixel is a small piece of code that can be found on your website that records what visitors do. It tracks page views, cart actions, checkouts, and purchases. Without it, Meta has no feedback loop to optimize your ads.
When people ask how to track purchases on Facebook ads, this is always the starting point. If Pixel is installed poorly, everything else becomes unreliable.
Let’s set it up properly.
Inside the Meta Events Manager, you’ll create your Pixel.
Follow these steps:
Once created, you’ll install it through the setup flow.
Select your Pixel and click Continue Pixel Setup.
You’ll see two installation options:
Partner integrations are easier for beginners. But manual installation gives you full control and is common for custom-built websites.
If you choose manual setup, here’s what to do:
That placement matters as the header ensures the Pixel loads on every page.
You’ll also see an option for Automatic Advanced Matching. Enable it if possible. It helps match users more accurately by sending hashed customer data like email addresses.
After installation:
At this point, the Pixel begins placing first-party cookies in visitors’ browsers and tracking activity tied to your domain.
Never assume the code works just because you pasted it. Before you deploy your plans, always verify if everything is working properly.
To check, use:
Visit your website. You should see a PageView event firing immediately. Click through a few pages, and confirm events appear in real time. If nothing fires, fix it now. Do not run ads until it works.
Before moving forward, you need to know what the Pixel can and cannot do.
This is why Pixel-only tracking often underreports results.
First-party click tracking helps improve reliability because it stores a cookie directly on your domain. And broader attribution tools can capture user journeys across multiple channels, not just Meta.
But none of that matters if the Pixel foundation is shaky.
Set it up clean. Test it. Confirm it fires correctly. Once that’s done, you’re ready to configure purchase events and build a reliable tracking system that supports real revenue growth.
Not every event deserves equal attention. If you try to track everything, your dashboard becomes cluttered and hard to interpret. Instead, think in terms of buying intent. Which actions actually move someone closer to pulling out their card?
Here are the key standard events you should enable and why they matter.
Purchase
This is the most important event. It fires when a customer completes a transaction. It tells you that someone who clicked or viewed your ad ended up buying. Make sure it triggers only on the order confirmation page and includes value and currency details. Without this event, you cannot calculate true return on ad spend.
Add To Cart
This event shows when someone adds a product to their cart. It signals strong intent but not commitment. Many people abandon carts, so this event helps you measure drop-offs and build retargeting audiences.
Initiate Checkout
This fires when a shopper begins the checkout process. It sits between Add To Cart and Purchase in the funnel. If many users reach this stage but few complete payment, your checkout flow may need improvement.
Add Payment Info
This event captures users who enter billing details. It represents very high buying intent. Tracking it helps you identify where final friction occurs before payment confirmation.
View Content
This fires on product or service pages. It measures interest. If your ads drive traffic but View Content numbers are low, there may be a landing page mismatch.
Leads
If you run campaigns focused on email signups, gated downloads, or membership forms, this event captures those actions. It is essential for businesses that rely on list building before sales.
Complete Registration
This event records when someone finishes creating an account or registering on your site. It is especially useful for subscription models or platforms with onboarding flows.
Contact
When a prospect submits contact details such as phone number or email through a form, this event tracks it. It works well for service-based businesses or high-ticket products where conversations drive sales.
When you map these events properly, you can see the full journey from interest to purchase. That clarity is what turns ad spend into informed decisions.
Once your base pixel is active, the next critical step is creating the actual “Purchase” event. This is the event that confirms revenue. Without it, you are only tracking interest, not sales. Facebook makes the setup straightforward if you follow the sequence carefully.
Start inside your Facebook account:
This part matters more than most people realize because Facebook does not just need to know that a purchase happened. It needs to understand how much revenue was generated, in which currency, and what was sold.
If you leave out these parameters, your reporting becomes incomplete, and your ROAS calculations may look wrong. Your optimization may suffer because the algorithm cannot learn from accurate revenue data.
Next, install the generated event code on your “order confirmation page.” This ensures the Purchase event fires only after a successful transaction. It should never trigger on checkout start or page refresh.
If you use platforms like Shopify or WooCommerce, you can automate this integration through built-in tools or third-party connectors. Automation reduces manual errors and keeps data flowing consistently.
Once installed, run a test purchase. Check “Events Manager” in real time. If the Purchase event fires correctly with accurate value data, you’ve done it right. If not, fix it before spending another dollar on ads.
Let’s talk about the big upgrade. Browser pixels can be blocked. But server-to-server tracking cannot be blocked the same way.
That’s where Conversions API comes in.
Instead of relying only on the user’s browser, your server sends event data directly to Meta. This improves accuracy and reduces loss.
Ideally, you run both:
When both send the same event, Meta deduplicates them using event IDs. That prevents double-counting.
Some of its benefits include:
Many brands see reporting stabilize after enabling this.
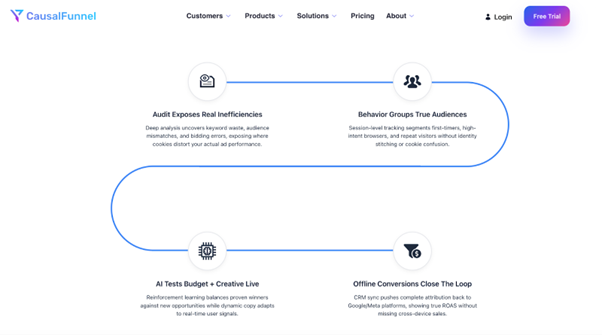
If you’re working with an agency like CausalFunnel, this is usually part of their conversion tracking setup service, along with structured funnel mapping and advanced analytics consulting. They also provide AI-driven attribution modeling and predictive ROAS forecasting, which helps businesses move beyond last-click thinking.
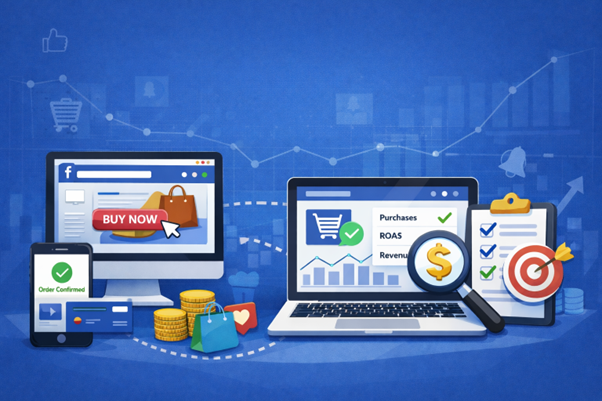
Once tracking works, the next job is reading it correctly. To properly monitor Facebook ads, you need custom columns in “Ads Manager.”
Inside Meta Ads Manager:
Click Columns → Customize Columns.
Add these metrics:
Don’t only focus on ROAS. Also, look at how much you are paying for each sale and how often people are seeing your ad.
If the same people see your ad more than 3 or 4 times and your sales start to drop, it may mean they are getting tired of it. When that happens, it’s usually time to change your ad creative or audience.
Also, review attribution settings. Meta defaults may change. It’s always good to compare 7-day click vs 1-day click data to understand delayed conversions.
We’ve seen brands worry because one day shows zero sales. But if you are using a 7-day click setting, a purchase can still show up a few days later. Someone may click today and buy tomorrow, or even three days later.
Good data needs time to settle. If you change or stop a campaign too quickly, you might kill something that was actually working.
Meta reports one side of the story. You need a second lens. That’s where Google Analytics 4 comes in.
GA4 won’t match Meta exactly. It uses different attribution models. That’s normal.
Start with UTM parameters in every ad:
Add them at the ad level. Not just campaign level.
Inside GA4:
If Meta shows 100 purchases and GA4 shows 60, don’t panic. Differences are expected. Look at trends, not exact matches.
When you check your numbers across both platforms, and they match, you can trust your data more. It shows your tracking is not just a guess, but based on real customer actions.
Here’s where things usually go wrong. Most tracking problems are not complex. They are small setup errors that create big reporting confusion.
Each of these can distort data badly. Before scaling budgets, audit these basics. It’s cheaper to fix tracking than to waste ad spend. Fixing these issues often solves most tracking headaches.
Don’t trust dashboards blindly. Test the system yourself. Even if everything looks fine in Events Manager, you should still verify it end-to-end. A few minutes of testing now can save you weeks of confusion later.
Here’s a simple checklist you can follow:
When both platforms reflect the same sale and the numbers align, you can move forward with confidence instead of guesswork.
The most reliable method combines proper structure. Learning how to track purchases on Facebook ads is not a one-time setup. It’s an ongoing process because platforms and privacy rules change. The brands that win are the ones that audit tracking monthly, not yearly.
If your revenue depends on paid ads, tracking isn’t technical overhead. It’s financial control. If you’re not comfortable scaling spend without knowing your numbers, it’s time to put efforts on learning how to track our Facebook purchases.
Purchases do not always appear instantly. Depending on your attribution window, they may show within a few hours or even a few days. If you are using a 7-day click setting, a customer can click today and buy later, and the sale will still be counted.
This usually happens because the pixel is not installed correctly, the event is placed on the wrong page, or the domain is not verified. Start by checking Test Events and make sure the Purchase event fires only on the order confirmation page.
In most cases, yes. The Pixel tracks browser activity, but browsers now block or limit some data. Conversions API sends data directly from your server, which improves accuracy and reduces data loss.
You should test your tracking every time you change your website, checkout process, or ad structure. Even small updates can break event tracking without you noticing.
Daily fluctuations are normal. Look at 7-day trends instead of single-day performance. Reacting too quickly can lead to turning off campaigns that are actually working.
If you sell directly through Facebook or Instagram Shops, Meta handles much of the tracking. But if you send traffic to an external site, you need Pixel and preferably Conversions API for accurate reporting.
Start using our A/B test platform now and unlock the hidden potential of your website traffic. Your success begins with giving users the personalized experiences they want.
Start Your Free Trial
Empowering businesses to optimize their conversion funnels with AI-driven insights and automation. Turn traffic into sales with our advanced attribution platform.
Trusted by Customers


©CausalFunnel Inc. All rights reserved.